How to Make a Straw Clutch Purse

sewing your straw clutch purse is easy!

Learn to Sew a Straw Purse

You actually found a place where you can find easy-to-apply techniques for making a straw clutch purse. Bravo! You did well. I wish a site like this was around when I was learning how to make handbags. But the good thing is, now it’s available for you. So, go through the videos at your pace; there’s no rush. I’m including links to some supplies but when it comes to buying straw, there are no online suppliers that I know of at this time. A few stores in Nassau carry a selection, but there are individuals who plait and sell their straw and sisal products in Long Island, Cat Island, Andros, and New Providence. If there are other islands I’m sorry I missed you. 

materials for making a straw cutch purse

This list is quite simple. The materials and tools are pretty much like my other handbags except for the straw and plastic. And of course you really won’t be needing the foam. One of the key ingredients for a spacious purse is the plastic interior. As noted in the video, the spray adhesive is also something I firmly stand by. 

Here’s a short list of a few of the tools. A poundo board, cutting mat, L shaped ruler, rawhide mallet, and a french curve if you want to change the shape of your purse. You’ll see that I’ve highlighted some of the products needed in the description for your ease of reference. You can click on the link to add it to your Amazon cart or you can also get my What’s in Your Handbag, Girl? book for a list of suppliers. So let’s get started!

how to design your straw clutch purse

This is fairly simple. A good-looking purse doesn’t have to be busy or cumbersome. I will demonstrate the simple way of drawing your purse design and developing the shape and size as well as laying out the segments for your pattern. This makes your pattern-making experience a breeze. If you have already watched my fabric clutch purse video, then you may want to skip this video and go on to the next one. Let’s get started.

how to make a straw clutch purse pattern

Your pattern is the foundation of your purse design. If your pattern is off, (unbalanced and twisted) then your purse will be the same. Many people doing straw craft have lots of great ideas for making beautiful purses but the truth is they never really learned how to make a great pattern. I’m not talking about the design, I’m referring to the structure. The good news is you can learn how to make a pattern today. This technique will help you to adapt your designs for an overflow of new designs. So no more twisted hand-me-down patterns for you. You can create original designs from here on in.

In place of pattern paper, I use a sturdy poster board. A good item to have on hand when making multiple patterns are pattern hooks. These help you to stay organized by keeping all your pieces together. 

cutting your straw clutch materials

This is a simple task but it’s still one you should review. The little tips will help you to ensure your pieces line up properly and the sewing project goes smoothly.

sewing the straw clutch purse

One of the key things you will need to remember when sewing your straw is to first buy a smooth quality straw that has somewhat of a consistent width and plait structure. What someone might get away with for a crab basket or a mat may not be the ideal straw for a refined purse.  Examine your straw for consistency. If you want to sell your product as a designer item it will have to look the part.

A major error some purse makers make when sewing straw is to sew too far away from the edge. Keeping your needle consistent and close to the edge gives you a more refined look. Many people sew their clutch purses with chipboard, some with cereal boxes, this tutorial will take on a slightly different approach to allow you more room in your purse.

How to install hardware

There’s not a lot of hardware on a clutch purse, in fact, we’ll only be installing a twist lock closure. However, for those who want to jazz things up a bit, you can add a cute handle. You can pop over to my structured handbag video tutorial for more information on that. Incidentally, you can also use a tuck lock, which looks fabulous on a clutch as well as a magnetic snap closure. There are a number of styles to choose from.

how to attach your purse lining

I think it’s fair to say most of us would prefer to click the easy button if it means we can do something faster, and easier without compromising our product. Traditionally, purse makers use a thin lining fabric that slips and slides off the surface as you attempt to manhandle it in place just long enough to stitch it down. While you can use a double-sided fabric tape to hold it in place, this is a faster more efficient method. This also ramps up your production time if you are producing more than one bag at a time. So, that’s what we’ll be doing here, saving production time and you know what, time is money. A quick note, be creative, don’t settle for a boring brown interior. Give your clients something fun to look at, so that using your purse reminds them of the tropics whether it is in solid heavier weight fabrics, soft pastels or bold funky prints.

how to sew purse binding

You can use webbing for this, or you can use the straw. Not the same straw you will sew the bag with, rather the peel version. The peel plait is softer and an ideal solution for a professional look, and is easy on the hands in my opinion.

If you are going to use webbing, use a lightweight 1″ one. Anything over 1″ begins to look clunky, especially when going around the corners. Lastly, many people start their bindings in a visible place. I choose to put it under the flap, right in the middle to hide it away.

machine stitching your clutch purse sides

Machine stitching is the fast and easy method of sewing your purse sides. It has a neat appearance if you can give it a straight stitch, but the look is not as relaxed as the hand stitching method I will also share with you after this video. By all means though, if your machine has the lift capacity under the presser foot to sew the sides together it is a good option.

Completing Your Twist Lock Installation

Now that the purse is sewn together, we need to complete the lock. If you like gadgets or tools you’ll love giving this hole a good wallop to finish the installation.

How to Clean & glaze your straw purse

Well, this is your last leg of the race, cleaning, and glazing. This is not the only method, but it is an effective one. Let’s get to it.

It was so good having you join me in this tutorial. Have fun making beautiful purses and remember to like, subscribe and share my videos.

Happy Purse Making!

Leave a Reply

Your email address will not be published. Required fields are marked *

Sewing a Straw Clutch Video


Learn how to make an incredible straw purse with straw plait. Sew straw bags for your personal collection or for profit. From a basic pattern making technique, you can begin to build your collection of custom clutch purses with just a few quick snips and tips.

Here’s a short version of our video on making a straw clutch purse. The full bag making version is over an hour long and shows the step by step narrated process from design to completion. Go to How to Make a Purse in the Menu bar to register to view entire collection that teaches you how to make a designer handbag…the Teri Monique way.

Click on the link below to play.
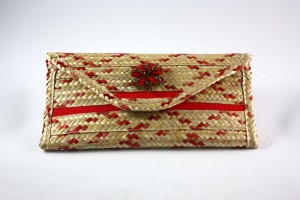
Sewing straw plait purses

[S3VIDEO file=’bags/Short version how to make a straw clutch_qtp.mov’]
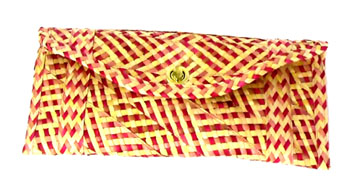
2 thoughts on “Sewing a Straw Clutch Video”

  1. Loletta Sands

    HI Teri,

    Thank you so much for the information. I know that my daughter (12yrs) will be interested, I myself. Where can I purchase the straw work and closures?

Leave a Comment

Your email address will not be published. Required fields are marked *